Confession: For years, I threw away the seeds after carving pumpkins. Roasting them just didn’t seem worth the trouble—why mess with all that stringy, slimy pumpkin flesh?
Then a few years ago, after learning more about food waste and vowing to make the most of every ingredient, I decided not to toss the seeds. Instead, I roasted them and realized that crispy, baked pumpkin seeds are super easy to make! Their nutty flavor was so addictive, they didn’t even make it to the pantry. My family gobbled them up, risking burned fingers, straight from the sheet tray.
The best part is, pumpkin seeds are packed with nutrients. They’re high in protein and fiber, and they’re a good source of minerals like zinc and iron. So the next time you make jack-o’-lanterns, save the insides and follow our Test Kitchen’s step-by-step guide for how to roast pumpkin seeds.
Roasted Pumpkin Seeds Recipe
Here’s our easiest method for roasting pumpkin seeds. Trust us—these toasted seeds aren’t going to last long! This roasted pumpkin seeds recipe makes 2 cups.
Ingredients
- 2 cups fresh pumpkin seeds, or whatever you scoop from 1 pumpkin
- 3 tablespoons butter, melted, or an equal amount of your favorite cooking oil
- 1 teaspoon salt and/or other seasonings
- 1 teaspoon Worcestershire sauce, optional
Directions
Step 1: Preheat the oven
Preheat the oven to 250°. Line a large sheet pan with aluminum foil and lightly grease it with butter or oil. (This reduces cleanup later—trust us on this!)
Test Kitchen tip: Preheating your oven will help the pumpkin seeds cook evenly. The result: perfectly roasted, crispy pumpkin seeds.
Step 2: Scoop out the seeds

Most of us are pretty familiar with this part from a lifetime of pumpkin carving. Using a sharp, sturdy knife, cut around the top of the pumpkin and remove the “lid.” (For more tips on this, see our guide to how to carve a pumpkin.) Using a large spoon, scrape the sides of the pumpkin to remove the seeds and pulp. Place everything—pulp and all—in a large bowl.
Step 3: Separate the gunk from the pumpkin seeds

You might be wondering, “Do you have to clean pumpkin seeds before roasting?” The answer is yes. I used to dread handling that slimy, stringy pumpkin flesh, but it’s actually much easier than I thought. Just use your fingertips to pull the seeds free. Leave the large pieces of pumpkin pulp in the bowl as you transfer the seeds to a colander. They’ll still look pretty goopy—don’t worry.
The fibrous strands can be challenging to remove, but we have a trick for that: Rinse the seeds in the colander under cold running water. The water will loosen the strands and make it easier to pull them off.
Test Kitchen tip: Don’t worry if you have some pumpkin pulp clinging to the seeds. It’s really hard to remove every last bit! During testing, we found that extra strands didn’t make a huge difference once the seeds were roasted. But leaving all the gunk on prevents the seeds from getting nice and toasted.
Step 4: Rinse and drain

Once you’ve removed most of the pulpy pieces, it’s time to get the seeds ready for seasoning. Some people swear by boiling or soaking the seeds in salt water to make them extra crispy after baking, but we didn’t find that this extra step made much of a difference. Simply rinse the seeds under cold running water and pat them dry with a towel.
Test Kitchen tip: Patting the seeds dry is an important step. Excess water can create steam in the oven, which prevents the seeds from crisping. The seasonings we use in the next step also adhere better to dry seeds.
Step 5: Season the pumpkin seeds

It’s time to season! We like salt and Worcestershire sauce, but you can also use pumpkin spice seasoning, or just douse with salt and pepper. Or, try one of these other roasted pumpkin seed variations:
Whichever flavor profile you choose, combine the seasonings with the butter or oil in a small bowl. Then drizzle the mixture over the dry seeds in a medium-sized bowl. Stir to make sure each seed is coated.
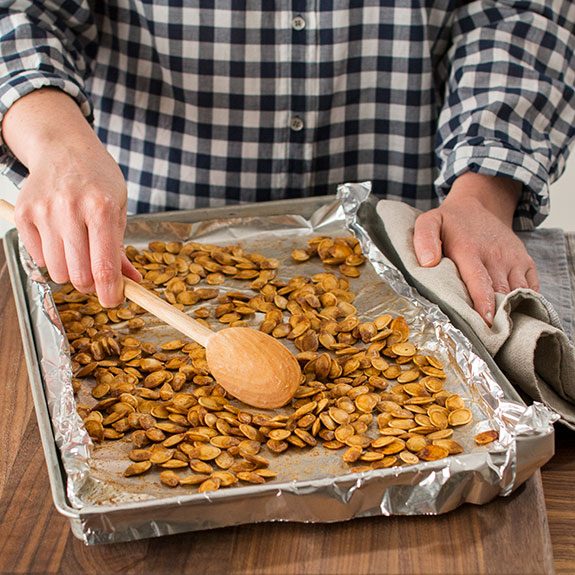
Step 6: Bake the pumpkin seeds, stirring occasionally

Now we’re ready to bake! Spread the seeds evenly in a single layer on your prepared baking sheet. Bake for 45 minutes, making sure to stir and toss the seeds occasionally.
Test Kitchen tip: Most ovens have hot spots, which can lead to burnt seeds. Our experts found that stirring the seeds from time to time promotes even browning.
Step 7: Finish baking pumpkin seeds on higher heat
Cooking in a 200° oven helps the pumpkin seeds cook evenly inside and out, so they don’t burn before they’re cooked through. But we won’t settle for evenly cooked seeds—we want crispy seeds!
The solution: Increase the oven temperature to 325° after the first 45 minutes. Then continue baking the seeds for about 5 more minutes, or until they’re lightly browned and dry.
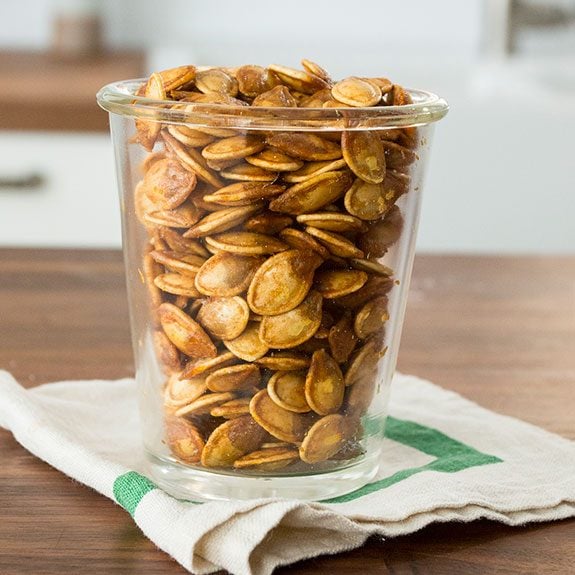
Step 8: Serve, store and enjoy!
You can serve the seeds warm (I always risk singed fingertips to snatch a snack right off the sheet pan), or you can let them cool and enjoy at room temperature. If you’re storing them for later use, set the pan on a cooling rack until the seeds are fully cooled, then place in an airtight container.
This recipe yields approximately 2 cups of seeds, so you’ll have enough to snack on and use in some fun recipes. The nutty flavor makes pumpkin seeds a great substitute for nuts in this pumpkin pie-spiced granola. They also make an excellent salad topping—try them in this apple walnut salad.
Roasted Pumpkin Seed Tips
Should Pumpkin Seeds Be Soaked Before Roasting?
Some people soak pumpkin seeds before roasting them—they say it helps make the seeds extra crispy. But our Test Kitchen found that soaking the seeds didn’t make much of a difference when it came to crispiness. If you do soak your seeds, though, be sure to dry them thoroughly before roasting. Otherwise, the water could steam in the oven, causing the seeds to be chewy instead of crispy.
Do Roasted Pumpkin Seeds Go Bad?
Like other types of nuts and seeds, roasted pumpkin seeds can go rancid. (There may also be other pantry ingredients you’re keeping for too long.) Store cooked pumpkin seeds in an airtight container for up to 2 weeks. You can also freeze them for up to 3 months, but they might not be as crispy as they were before freezing.
If you carve pumpkins but don’t want to roast the seeds right away, rinse them to remove the pulp and refrigerate in an airtight container. Roast within 2 to 3 days. You can also freeze raw pumpkin seeds—just wash them to remove the pulp, then allow them to dry completely before freezing in an airtight container.
Why Are My Roasted Pumpkin Seeds Chewy?
There are several reasons roasted pumpkin seeds may be too chewy:
- There was too much pulp still attached to the seeds before baking.
- The seeds were still wet (from rinsing off the pulp) before baking.
- The seeds weren’t baked long enough.
- The seeds didn’t finish cooking at a high enough temperature. (Roast at 200° for 45 minutes and then at 325° for 5 minutes or until the seeds are golden brown.)
- The seeds were too crowded on the pan—make sure they’re in a single layer on the baking sheet.
Which Pumpkins Have the Best Seeds for Roasting?
You can roast the seeds from any kind of pumpkin. Some people prefer pumpkin seeds that have thin outer shells or no hulls at all. Styrian and Kakai pumpkins are typically grown for their hull-less seeds, which are better known as pepitas. However, these pumpkin varieties may be hard to find. You can also roast the seeds from other types of winter squash, like butternut and acorn.
How Do You Eat Pumpkin Seeds?
You can eat the outer shell of pumpkin seeds and many people do. But if you prefer hull-less pumpkin seeds, you can remove the hulls or stick to pepitas.
There are dozens of ways to use pumpkin seeds, whether you snack on them straight from the sheet pan, toss them on salads or add them to granola. You can also try sprinkling them on a bowl of butternut squash soup or whipping up a batch of this pumpkin seed toffee.

Taco Pumpkin Seeds

Nuts and Seeds Trail Mix
A filling blend of nuts, seeds, chocolate chips and dried fruit keeps you healthy by the handful. —Kristin Rimkus, Snohomish, Washington
Fresh Pumpkin Soup
This appealing soup harvests the fall flavors of just-picked pumpkins and tart apples and is sure to warm you up on a crisp autumn day. I top the creamy puree with a sprinkling of toasted pumpkin seeds. —Jane Shapton, Irvine, California
Sesame-Garlic Pumpkin Seeds
This “everything” mix of pumpkin seeds with other seeds and seasoning is a fun treat—a lively way to use the seeds left over from your Halloween jack-o’-lantern! —Danielle Ulam, Hookstown, Pennsylvania
Honey-Squash Dinner Rolls
These puffy dinner rolls take on rich color when you add squash to the dough. Any squash variety works. I've even used cooked carrots. —Marcia Whitney, Gainesville, Florida
Maple Morning Granola
Salty and sweet ingredients combine for an easy, wholesome breakfast or snack. Hosting a kids' party? Pack the granola into treat bags and present them as take-home favors. —Elizabeth Godecke, Chicago, Illinois
Avocado Goat Cheese Truffles
Give guests the VIP treatment with luxurious truffles you can make in your own kitchen. The goat cheese is mild, and red pepper heats up each bite just a bit. Crackers are the perfect accompaniment. —Roxanne Chan, Albany, California
Caliente Cheese Crisps
To fire up the crowd, I pack these homemade crackers with bacon, pumpkin seeds and French-fried onion rings. Dunk them in picante sauce. —Jeanne Holt, Mendota Heights, Minnesota
Pumpkin Pie-Spiced Granola
My husband says this granola with pumpkin and spices tastes like a bite of real pumpkin pie, and it’s a whole lot quicker to make. —Sarah Ozimek, Oconomowoc, Wisconsin
Festive Rice
My mom and I transformed plain rice by adding feta, cranberries, pumpkin seeds and cayenne. We wound up with a sweet and spicy crowd-pleaser. —Lisa de Perio, Dallas, Texas
Apple Walnut Salad
The pumpkin seeds and homemade dressing make this salad so special—and healthy, too. Add leftover turkey and you’ve got a main-dish salad. —Bjorg Martin, Noblesville, Indiana
Garlic Pumpkin Seeds
Wondering what to do with all those pumpkin seeds guests will be scooping out at your pumpkin-carving party? This yummy, microwave-easy recipe is the answer! Save some for yourself before they're gone! —Iola Egle, Bella Vista, Arkansas
Quinoa-Stuffed Squash Boats
My colorful “boats” with quinoa, chickpeas and pumpkin seeds use delicata squash, a winter squash with edible skin that’s cream-colored with green stripes. In a pinch, acorn squash will do—but don't eat the skin! —Lauren Knoelke, Milwaukee, Wisconsin
Pumpkin Seed Munchies
Magically transform squash or pumpkin seeds into a spellbinding snack with ranch salad dressing mix. —Taste of Home Test Kitchen
Brandied Blue Cheese Spread
Pour on the holiday spirit with a splash of brandy and three kinds of cheese. Pumpkin seeds, or pepitas, are a crunchy topping for the smooth spread. —T.B. England, San Antonio, Texas
Seeded Butternut Squash Braid
Crunchy, green hulled pumpkin seeds (better known as pepitas)add a slightly nutty taste to this rich and moist bread. Because of their high oil content, pepitas can spoil quickly. Make sure you store them in the freezer to keep them fresh. —Cheryl Perry, Hertford, North Carolina
Spiced Sweet Potato Soup
This Thanksgiving serve your spuds as soup. It makes a unique first course, and guests will love the creamy texture and flavors of ginger, cinnamon and curry. —Lisa Speer, Palm Beach, Florida
Pumpkin Seed Cranberry Biscotti
A hint of pumpkin seed and almond gives this biscotti recipe a wonderful flavor that's just right for fall. Try these with a cup of coffee or hot cocoa! —Nancy Renner, Sequim, Washington
Roasted Pumpkin Seeds
Roasting pumpkin seeds is easier than it seems. Just hollow a pumpkin out, spice 'em and bake 'em for a fun snack. —Dawn Fagerstrom, Warren, Minnesota
Trail Mix Clusters
These delicious snacks make wonderful gifts, and although they look and taste like they came from an expensive chocolate shop, they couldn't be more guilt-free. The dried fruit and nuts are heart-healthy and full of fiber. Bet you can't eat just one! —Alina Niemi, Honolulu, Hawaii
Salmon & Spinach Salad with Avocado
We eat a power salad packed with salmon and spinach at least once a week. It’s a cinch to make, even after a hard day’s work. —Jenny Dawson, Fond du Lac, Wisconsin
Mocha Pumpkin Seeds
Roasted pumpkin seeds are a classic fall snack. Kick them up a notch with instant coffee and cocoa powder for a mix that’s mocha genius at any time of year. —Rebekah Beyer, Sabetha, Kansas
Roasted Butternut Squash Panzanella
Squash was a hard sell with my family until I paired it with pumpkin seeds, cranberries and horseradish. Now they love it! —Devon Delaney, Westport, Connecticut
Pumpkin Seed Toffee
My kids are allergic to nuts, but they can eat pumpkin seeds! Every fall we save the seeds from our pumpkins to add to various recipes, including this one. —Suzanne Earl, Spring, Texas
Maple Apple Baked Oatmeal
I've tried a number of different types of fruit for this recipe, but apple seems to be my family's favorite. I mix the dry and wet ingredients in separate bowls the night before and combine them the next morning when it's time to make breakfast.—Megan Brooks, Saint Lazare, Quebec.
Great Grain Salad
I can't think of a better dish to round out a meal. My grain salad features all my favorite nuts, seeds and fruits. Try adding grilled chicken to make it a meal on its own. —Rachel Dueker, Gervais, Oregon
Light Roasted Pumpkin Seeds
Try this zippy twist on a favorite Halloween tradition. These amped-up pumpkin seeds have just enough heat to take the chill off autumn afternoons! —Taste of Home Test Kitchen, Milwaukee, Wisconsin
Slow Cooker Sweet Potato Soup
I love that I can top this creamy soup with anything my heart desires, which means I can eat it several days in a row without ever having to have it the same way twice. You can substitute fresh onions and celery in this recipe if you prefer, but using the dried version makes it easy to throw together on a weekday morning. —Colleen Delawder, Herndon, Virginia
Roasted Fresh Pumpkin Seeds
I learned how to roast pumpkin seeds from my mother, who learned it from her mother. Keep an eye on the seeds so they don’t scorch. —Margaret Drye, Plainfield, New Hampshire
Creamy Pumpkin Hummus
I love to serve this pumpkin hummus with sliced apples, pears and pita chips. Top it with toasted pumpkin seeds, a drizzle of pumpkin oil and even fried sage leaves. —James Schend, Taste of Home Deputy Editor
Fennel Wild Rice Salad
This is a salad I invented years ago when my sister's family had to go gluten-free. It has since become a family favorite, and Thanksgiving just isn't the same without our wild rice salad! —Aimee Day, Ferndale, Washington
Spicy Pumpkin Seeds
We look forward to fall in anticipation of making these spicy pumpkin seeds. I often put some in a decorated jar to give as a gift.The post How to Roast Pumpkin Seeds, Step by Step appeared first on Taste of Home.
source https://www.tasteofhome.com/article/roast-pumpkin-seeds/
0 Response to "How to Roast Pumpkin Seeds, Step by Step"
Post a Comment