This fried chicken doesn’t come from a pan of hot oil—it’s made in your oven! A delicious dish to add to your dinner repertoire, oven-fried chicken breasts are a cinch to make once you know the tricks to adding lots of flavor and getting that crispy, browned coating on the outside. Using the oven instead of deep-frying means a lot less mess in the kitchen, too.
No matter what the cut, cook chicken the right way with our in-depth guide on how to cook chicken.
Key Ingredients for Oven-Fried Chicken Breasts
Chicken
Our favorite cut for oven-fried chicken is boneless, skinless chicken breast, sliced into thin cutlets. They bake through in no time with a generous ratio of crispy coating to meat. The breading technique can also be used for other cuts like thighs or bone-in breasts—just adjust the baking time accordingly as these cuts will take longer to cook through.
Avoid raw chicken cross-contamination during prep.
Flour
Flour is a crucial ingredient for breaded, oven-fried chicken. As the first ingredient to coat the raw chicken, flour absorbs excess moisture on the exterior of the meat while creating the best surface for the liquid breading step that comes next. All-purpose flour blended with cornstarch is our choice here, but other flours like rice, chickpea, quinoa and semolina can be substituted.
Buttermilk
Thick and tangy buttermilk is a favorite for marinating bone-in chicken pieces, but in this recipe it’s a flavorful part of the breading. A blend of buttermilk and egg coats and clings to the chicken after flouring; when the bread crumbs are added, that buttermilk mixture holds them in place.
Bread Crumbs
For the best texture on oven-fried chicken, go with panko bread crumbs which are more widely available in grocery stores now than they were a decade ago. They’re lighter than traditional varieties, with large, flaky crumbs that stay crunchy after baking.
Oven-Fried Chicken Breasts Recipe

The recipe makes 4-6 servings.
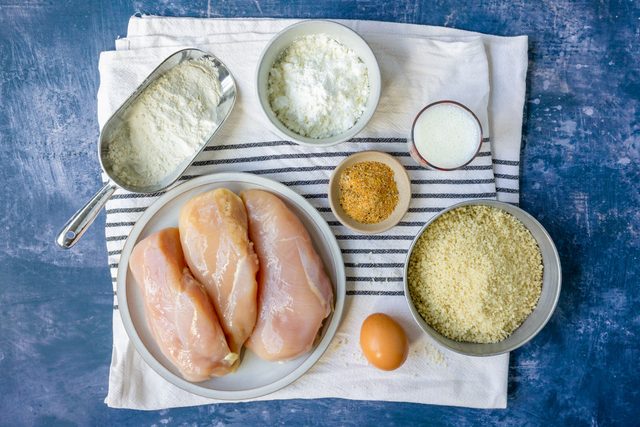
Ingredients
- 2 tablespoons butter
- 1 tablespoon vegetable oil
- 2 pounds boneless chicken breast
- 1/2 teaspoon salt
- 1/2 teaspoon curry powder
- 1/2 teaspoon onion powder
- 1/2 teaspoon garlic powder
- 1/4 teaspoon black pepper
- 1/4 teaspoon smoked paprika
- 1/3 cup all-purpose flour
- 1/3 cup cornstarch
- 1/2 cup buttermilk
- 1 large egg
- 2 cups panko bread crumbs
Directions
Step 1: Prepare the chicken

Preheat the oven to 425°F. Line a large baking sheet with foil or parchment paper. Melt the butter together with the oil (in the microwave or in a small saucepan on the stove.) Use a brush to spread the butter-oil over the foil or parchment paper.
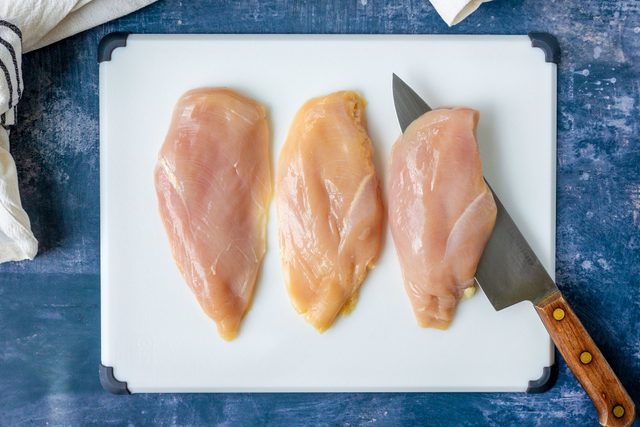
Slice each chicken breast into two thinner cutlets: place your hand on top of the flat piece of chicken on a cutting board, and position the knife blade parallel to your hand. Slice carefully through the chicken breast to create two halves of equal thickness (or as close as you can!). Thinner cutlets that have a relatively uniform thickness will cook through more evenly and at the same rate. If there are any areas of the chicken that seem too thick, use a rolling pin or other heavy object to pound the meat and make it thinner.
Step 2: Season the chicken

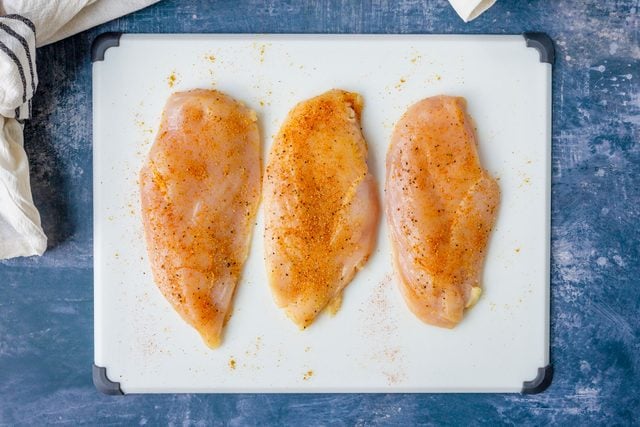
Stir together the salt, curry powder, onion powder, garlic powder, black pepper and smoked paprika in a small dish. Sprinkle some of the spice mixture over each chicken breast cutlet, and then rub the spices into the meat with your fingers. Flip the cutlets over and repeat on the other side with the rest of the seasoning.
Step 3: Coat the chicken

Get the three coatings ready: Pour the flour and cornstarch onto a large plate and stir them together with a fork. Hold this aside. Combine the buttermilk and egg in a large, shallow bowl, whisking them well until the mixture is smooth. Hold it aside. Finally, pour the panko bread crumbs onto another large plate. Have these three dishes ready in a work area next to the seasoned chicken breasts and the prepared baking sheet.
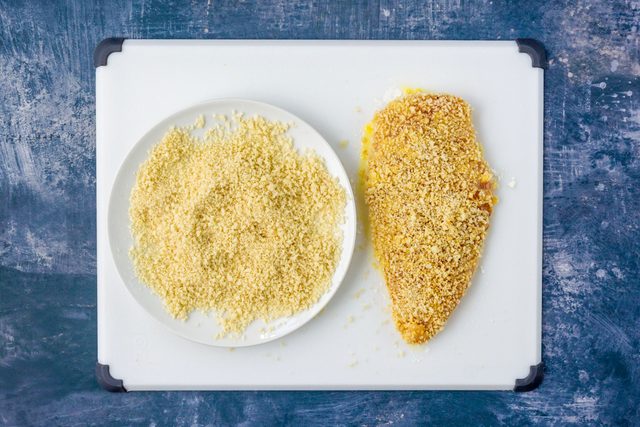
First dredge a chicken cutlet with the flour-cornstarch mixture on both sides, tapping off the excess. Next, dip the chicken into the buttermilk-egg mixture to coat both sides. Finally, press the chicken into the panko bread crumbs until the whole surface is coated; press them firmly to make sure they stick. Place the breaded cutlet on the baking sheet. Repeat these steps with the rest of the cutlets.
Arrange the chicken on the baking sheet with space between each piece: this is important because crowding the chicken will create steam and prevent the breading from crisping up. You can always use two baking sheets if necessary.
Step 4: Bake

Place the baking sheet in the heated oven and bake the chicken for 15 minutes. Carefully flip the chicken breasts over using tongs or two forks—move them carefully so that you don’t accidentally tear off the breading. Bake the chicken for another 5-10 minutes until the chicken is baked through (to an internal temperature of 165°) and the breading is crispy and browned. The time it takes for the chicken to cook through will depend on how thick the cutlets are, with thinner cutlets finishing more quickly.
Let the chicken rest on the baking sheet for about five minutes. (This makes it easier to move the chicken without the breading falling off.) Serve the oven-fried chicken breasts right away while they’re warm.
Editor’s Tip: Whisk together 1/2 cup mayonnaise with 1/2 cup ketchup and a pinch of cayenne pepper to make a simple, homemade version of Mayochup to serve with these oven-baked chicken breasts.
How to Store Oven-Fried Chicken Breasts
Have these oven-fried cutlets waiting in the fridge or freezer for an easy meal down the road. After baking, allow the chicken to cool completely. Stack the breaded cutlets with pieces of wax paper (or butter wrappers!) between each one in a resealable bag or storage dish. Keep them in the fridge for up to five days. For longer storage, freeze them for up to three months.
To reheat the oven-fried chicken, first allow frozen cutlets to thaw in the fridge. Place the chicken on a lined baking sheet brushed with melted butter or coated with nonstick spray. Bake the cutlets at 350° for about 10 minutes, flipping them over once during baking, until they’re heated through.
You can also reheat the chicken in an air fryer: choose the reheat setting and air-fry the cutlets at 350° for 5-10 minutes. Check them every few minutes to make sure they don’t burn.
What to Serve with Oven-Fried Chicken Breasts

It’s hard to think of a side dish that wouldn’t go well with these crispy chicken breasts! Some of our favorites include veggie sides like coleslaw, collard greens and steamed broccoli. This fried chicken also pairs well with mac and cheese, cooked rice and fluffy biscuits served with butter. And don’t forget the saucy sides, like the homemade Mayochup in the recipe above. Ranch dressing, a spoonful of bottled chili crisp, barbecue sauce or a few drops of hot sauce are natural choices, too.
The post How to Make Oven-Fried Chicken Breasts appeared first on Taste of Home.
source https://www.tasteofhome.com/article/oven-fried-chicken-breast/
0 Response to "How to Make Oven-Fried Chicken Breasts"
Post a Comment