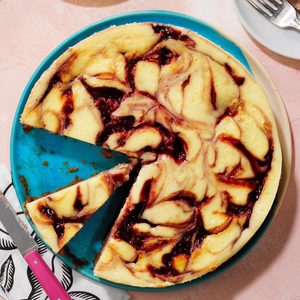
Ever find yourself in need of a wow dessert? You know the type: One that will have all your friends asking if you picked it up from a local bakery or asking if you really made that yourself. Usually, those desserts come in the form of mile-high pies or layer cakes, but you can stun your loved ones with another type of treat: a layered cheesecake.
That’s right: You can take your classic cheesecake to the next level not only by adding pretty swirls but by creating layers and layers of flavor. It takes a little patience, but the taste and the presentation are worth it. Here’s how to do it!
How to Make a Three-Layer Citrus Cheesecake

This layered masterpiece comes to us from one of our Community Cooks: Sue Gronholz of Beaver Dam, Wisconsin. She explains that this cheesecake might take longer to make, but the result is totally worth it, especially for a special occasion. So grab your favorite apron, a kitchen timer and these ingredients:
Ingredients
For the crust:
- 1 cup all-purpose flour
- 1/3 cup sugar
- 1 teaspoon grated lemon zest
- 1/3 cup cold butter, cubed
For the cheesecake:
- 4 packages (8 ounces each) cream cheese, softened
- 1-1/3 cups sugar
- 2 tablespoons all-purpose flour
- 1 teaspoon vanilla extract
- 4 large eggs, room temperature, lightly beaten
- 1/4 cup lime juice
- 1 tablespoon grated lime zest
- 3 drops green food coloring
- 1/4 cup lemon juice
- 1 tablespoon grated lemon zest
- 6 drops yellow food coloring, divided
- 1/4 cup orange juice
- 1 tablespoon grated orange zest
- 2 drops red food coloring
For the sour cream topping:
- 3/4 cup sour cream
- 1 tablespoon sugar
- 1/4 teaspoon lemon extract
- Optional: Orange slices, lime slices and lemon slices
Test Kitchen-Recommended Products
- Citrus zester: This cheesecake recipe gets so much of its flavor from fresh citrus zest. Pick up a zester to make the job easy.
- Springform pan: This is the pan you need to make cheesecake. Be sure you have one in your cupboards before you start stirring up this recipe.
- Hand mixer: You definitely don’t want to whip up a cheesecake batter by hand! Find a good hand mixer or stand mixer to help you do the job.
Directions
Step 1: Prep the Pan

Whenever you make cheesecake—be it a fancy layered option or even this delicious chocolate swirled cheesecake—you need to properly prep the springform pan. That means wrapping the bottom of the nine-inch pan in a layer or two of aluminum foil, even pans that claim to be leak-proof. This is just an extra measure of protection to make sure your cake doesn’t leak out. Cheesecake is hard work—you don’t want anything going wrong!
Once wrapped, grease the inside of the pan with a bit of shortening or cooking spray.
Step 2: Make the Crust

Next, it’s time to get going on the crust. In a bowl, mix together the flour, sugar and a teaspoon of lemon zest. Fresh zest is the best here! It’ll give you the most flavor.
With a pastry blender, cut in cold butter until the mixture is crumbly. Then press the crust mixture into the bottom of the springform pan. Use the flat bottom of a glass or measuring cup to really compress the crumbs and get an even layer.
Pop this into a 325º F oven and bake until the edges are lightly browned—about 25 to 30 minutes. When the crust is done, let it cool completely on a wire rack.
Step 3: Stir Up the Cheesecake Batter

When it comes to the cheesecake batter, start with a good quality cream cheese at room temperature. These cream cheese brands are our Test Kitchen’s favorites (you’ll find them in our fridges at Taste of Home HQ). Beat together the cream cheese and sugar until nice and smooth. You really want these ingredients well blended.
Then beat in the flour and vanilla extract. Even though this batter will be accented with citrus, it’s important to include a bit of vanilla to really give this batter a great depth of flavor.
Next, beat in the eggs on low speed until just blended. Do not continue to mix after the eggs are fully incorporated; this will add too much air to the batter which can cause your cheesecake to crack. That’s just one of many of our Test Kitchen’s essential cheesecake tips.
Step 4: Divide the Batter

Because this is a layered cheesecake, you’ll need to divide the batter into three equal portions. You can use a kitchen scale, large cookie scoop or measuring cup to get the measurements exact.

Now it’s time to give each portion of batter its own personality and flavor. To one bowl, add lemon juice, lemon zest and a few drops of yellow food coloring. To the next, stir in lime juice, lime zest and green food coloring, and to the final bowl, add in orange juice, orange zest, a drop of red food coloring and two or three drops of yellow food coloring. Stir each of these until the zest, juice and food coloring are well distributed.
Step 5: Pour in the First Layer

This is where this layered cheesecake starts to really take shape (and you have to start exercising a little patience).
Pour the lime layer of cheesecake batter onto the crust.
Step 5: Make a Water Bath

If there’s one step you can take to get a crack-free cheesecake, it’s creating a water bath. To make a water bath for your cheesecake, place your springform pan in a flat-bottomed roasting pan (or another very large pan).
Then place the roasting pan into your preheated oven (it should still be at 325º F for this recipe) and fill the pan with an inch of simmering water. Be sure not to splash any water into the batter. Then bake until the center is just set and the top looks dull—about 25 minutes.
Editor’s tip: The hot water cooks cheesecake batter more gently and makes the oven more humid—the perfect environment for cheesecake.
Step 6: Add the Second Layer of Batter

Once the first layer is done cooking, carefully remove the pan from the oven. Then slowly add the yellow lemon batter on top of the first layer. To prevent this new layer from disrupting the first be very gentle and even pour the batter over the back of a spoon.
Bake again until the top is dull and just about set—30 to 35 minutes.
Step 7: Add the Third Layer

Again, remove the cake carefully from the oven and layer on the final batch of batter. Return the pan to the oven and bake until the center wobbles slightly and the finish is dull—another 30 to 35 minutes.
All this layering does take patience, but it’s well worth it for the finished product!
Step 8: Top It Off with the Sour Cream Layer

Finally, it’s time for the last layer of the cheesecake: the sour cream topping. To make this topper, quickly stir together 3/4 cup sour cream, a tablespoon of sugar and 1/4 teaspoon of lemon extract. Then, using the back of a spoon, spread the topping over the orange layer of the cake.
Pop this back into the oven for a final five minutes.
Editor’s tip: If you don’t have lemon extract, feel free to substitute in orange or vanilla extract here.
Step 9: Cool
Once baked, remove the springform pan from the water bath and cool the pan on a wire rack for ten minutes. then loosen the sides from the pan with a knife and remove the foil. Let the cake sit out for another hour, then cover it and move it to the fridge to sit overnight.
After that overnight stay to let the flavors meld and cake set up, you can remove the collar of the pan, decorate with fresh citrus slices, cut wedges and serve!
Serving (and Saving) This Layered Cheesecake

After all that work of layering and waiting and cooling, it’s time to enjoy this masterpiece! Remove the cheesecake from the fridge about an hour before you’d like to serve. Then, to get the cleanest cuts so you can really see the layers, dip a sharp knife in hot water, wipe it dry and cut.
Any extras will keep in the fridge for three to four days. If you can’t finish the cake in that time, wrap slices tightly in plastic wrap then a layer of aluminum foil. Cheesecake will keep in the freezer for up to two months. When you’re ready to enjoy, defrost for two to four hours and grab a fork!
The post How to Make a Layered Cheesecake, a True Baking Masterpiece appeared first on Taste of Home.
source https://www.tasteofhome.com/article/how-to-make-a-layered-cheesecake/


0 Response to "How to Make a Layered Cheesecake, a True Baking Masterpiece"
Post a Comment